Many aspects of paint performance depend more on the quality of the base than on the color. The tint base largely determines the paint's toughness and resistance to dirt and stains, while the colorant determines how much the paint will fade. But you don't need a chemistry degree or a pro's experience to put on paint that lasts. Here's how to pick the right one for the job.
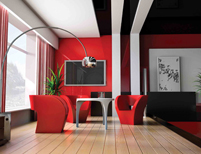
Create the feel that you want - choose your own colour scheme. What colours will you pick for which room? Decide for yourself but keep in mind these simple rules.
- Size/Shape of a Room:
Use paint tricks to make your room bigger or smaller. Light colours like pales and pastels lend space to a small room - they are airy and seem to “fade” the walls into a distance and “stretch” a low ceiling upwards. Bold colours are friendly and bring objects closer to create a cozy feel. Contract and match – square up a long narrow room by painting the short walls in a bold colour and the long walls in a bold colour and the long walls in a neighboring pastel.
- Lighting:
Do you have a lot of light in your room, natural or artificial? Cut down on glare by using dark shades. If you live in a warm climate, plan your colour scheme around the colours of water and trees. Low-lit spaces need sunshine or warm shades to brighten them up.
- Function:
You relate to your bedroom and your office in different ways. But whether you are at home or work, too many random colours in a scheme can be overpowering. While intense shades are bold and fun, they should be used to accent or punctuate neutral but cheerful colours. For instance a bold green can be teamed with a lighter yellow.
- Furniture and Furnishings:
Keep your furniture colour in mind - wood is also a colour! If you want to scale down a bulky sofa, put it against a wall of exactly the same shade. If you want to show it off, put it against a contrasting wall. To blend and yet preserve its identity, set it off against a colour with yellow tones – lime or yellow beige. Shades of white on walls can take the widest range of furnishings. On the other hand, light coloured furniture allows for the use of deep colours on walls, furniture colour in mind – wood is also a colour! If you want to scale down a bulky sofa, put it against a wall of exactly the same shade. If you want to show it off, put it against a contrasting wall. To blend and yet preserve its identity, set it off against a colour with yellow tones – lime or yellow beige. Shades of white on walls can take the widest range of furnishings. On the other hand, light coloured furniture allows for the use of deep colours on walls.
Painting your home or workplace is about much more than just protection of your walls. Just like the colours of the clothes you wear, the colours of your home are an expression of your personality. Moreover, the effects of the surroundings can be used to enhance your work place or dwelling place and set the mood you desire.
Here are a few ideas to plan and have your painting job done in a more organized way:
- Identify the rooms you wish to paint.
- Check for areas that require repair before you begin. Look out for cracks in the walls, seepage, loose plaster, etc. and complete all repairs before you start painting. Decide the shades/scheme you want to use in each room.
- To arrive at the right colour combinations feel free to see our online shade card or try our online virtual painting tool.
- Measure your rooms to find out the area you need to paint.
- Check our product range to see which brand of ours best meets your needs.
- You can then locate our dealer closest to your home by using the dealer locator. Or if you want us to take care of the entire painting process for you to find out about our Painting Service (available in select cities).
- Remove hardware from doors and windows, loosen light fixtures or mask them with tape and scraps of paper or cloth.
- Walls should be dusted thoroughly with a dry mop, except for bathrooms and the kitchen, which can be thoroughly washed.
- It is preferable to buy all the paint you need at one time and in the largest possible pack size for convenience and also to reduce the chances of slight colour variations between batches. It is also more economical.
Surface Preparation
Good surface preparation is an important part of a paint job as it can mean different things to different people. Also, what can be considered good preparation for one type of surface may not be so good for another type of surface.
Different types of surfaces (wood, plaster, metal, etc.) will require different paint preparation procedures. Furthermore, the preparation procedure for a given surface type at an interior of a home may be completely inappropriate for the same type of surface at a home's exterior. Use a wrong procedure or product and you can wind up with a real mess on your hands.
Preparation of New Plastered Surfaces
- Repair surface defects. Ensure the plaster is fully cured and dry.
- Sandpaper/wire brush to remove all loose sand, nibs and other build-ups.
- Scrape off fungus, mould growth and salt deposits by wire or coir-brushing. Wash with running water and leave to dry thoroughly.
- For interior walls smoothened with lime punning, allow 6 - 9 months for curing. For plaster of paris jobs, allow 20 - 25 days for drying.
Preparation of Previously Plastered Surfaces
- Repair surface defects. Remove soft, blistered, loose or flaky paint, chalk, dirt and dust: sandpaper, wire-or coir-brush under running water.
- If previous coating is Lime Wash or Dry Distemper, scrape off thoroughly.
- Wash fungus affected areas with fungicide. Observe for a few days for reappearance of fungus.
- Wash off stains and grease on interior walls with a mild soap solution.
- If previous coating of Acrylic Distemper or Emulsion Paint is in good condition, sandpaper lightly to remove surface sheen/gloss.
Preparation of New or Unpainted Metal Surfaces
- Scrape off all rust, scales, etc. and rub dry with emery cloth / paper or wet rub with kerosene.
- Wash with mineral turpentine, and wipe dry with clean cloth.
Preparation of Previously Painted Metal Surfaces
- Remove all blistered, loose or flaking paint.
- Clean rusted areas down to bright metal.
- Remove all traces of oil and grease with mineral turpentine, and dry.
Preparation of New or Unpainted Wood Surfaces
- Sandpaper along wood grain to smoothen the surface.
- Dust off.
- Treat the wood by applying 2 coats of anti-termite, anti-wood borer, etc. water repellent / anti-fungal solvent with 6 - 8 hour intervals.
- Dry for 72 hours.
Preparation of Previously Painted Wood Surfaces
- Remove all blistered, loose or flaking paint by scraping or dry sanding with emery paper No. 120.
- Remove all traces of oil, grease, smoke, by washing with soap solution.
- When dry, sandpaper lightly and dust off, etch out for painting defects, and know how to solve them
The best paints won’t give you value satisfaction if the job isn’t done right. Not doing it right invariably shows, sooner rather than later. To begin with, therefore, it’s best to watch out for painting defects, and know how to solve them
Cause
Atmospheric and Climatic Conditions
Defect: Bittiness
The painted surface feels rough and coarse. Small particles of solid matter project above the surface of the paint film.
Reason
- Dust in the atmosphere
- Dry and broken skin in the paint can
- Impurities in the paint can
- Unclean paintbrush
Solution
- Ensure clean and dust-free surface prior to painting.
- Strain the paint through cloth before painting.
- Do not apply paint in windy conditions.
Defect: Blistering
Formation of small bubbles on the surface of the paint film which may eventually burst, exposing the surface underneath.
Reason
- Trapped air or gases.
- Moisture beneath the paint film.
- Corrosion (rust) under the paint film.
Solution
- Allow the surface to dry fully.
- Avoid paint application in rain or extreme heat.
- Allow each coat time to dry sufficiently.
Defect: Blooming
Cloudy / dull discoloration and loss of gloss which sometimes forms on the surface of glossy paints or lacquers.
Reason
- Rapid condensation owing to surface cooling
- Use of fast evaporating solvents.
Surface Preparation for Wood
The wood should be dry. Any moisture in the wood will result into blistering of the paint system. Knots in a wooden surface, ooze some kind of oil and to prevent any damage from them, they must be sealed with Maripol B-30 knotting compound.
The dried wood should be dry-sanded, using medium-coarse paper. The sanding should be carried out across the wooden grains. Wipe off all loose particles and dust, using dry rag pad.
For all practical purposes, Richwood N.C. Sanding sealer must be used for sealing the pores of any wooden surface but for the best results:
Richwood Melamine Sealer must be used under Melamine Finish
While
Richwood P.U. Sealer is recommended under clear P.U. Finish.
Modus operandi for preparing the wooden surface remains common
- Seal all wooden knots with thin Maripol B-30 solution. Rag pad or a brush is used for the purpose. Allow to dry the knotting compound.
- Apply two coats of thinned sealer, wet on wet. Allow to dry for 2-3 hours. Dry sand using fine sand paper. Sanding must be carried out across the grains.
- Apply one more coat on the sanded surface, allow drying and sanding across the grains, using very fine paper.
- The surface must be silk smooth and all the grains must be well filled.
- Apply any finishing system, N.C., Melamine or P.U.
Surface Preparation for Metal
Cast Iron
The surface must be made free from oil, grease and rust, by sand blasting. If for some reason, sand blasting is not possible, Rustosan Rust Remover solution should be used. It removes oil and rust in single operation and also mildly phosphates the surface for longer lasting of any paint system. After priming with red oxide primer, blowholes, if any, should be filled up with two pack epoxy putty or with Eurofil Polyester Putty, which is also a two-pack system. Wet sand the putty with 80 number emery cloth. Allow to dry thoroughly and commence painting.Mild Steel
Any surface to be painted for the first time, sand blasting is ideal. In case, the surface is being repainted, remove old paint film, using Eurostrip Paint Remover and then use Rustosan Rust Remover, which will take care to remove rust and grease from the nooks and corners of the structure. In case, the painting is to be carried out in marine or chemically corrosive atmosphere, a thin coat of Rosalee Metaprime-H (two pack zinc chrome wash primer) is recommended. Again, for best corrosion resistance, Epolac Epoxy Zinc Rich Primer (two pack zinc primer) should be used.Galvanised Surface
After removal of oil or grease, a thin coat of Rosalee Metaprime-H, must be applied. In case economy does not permit the use of metaprime-h, synthetic zinc chrome primer can be applied. However, if there is any “white rust” on galvanized surface, it should be wiped off with 3-5% phosphoric acid.Brass, Copper or Bronze
On exposure to normal weather, these metals turn darker. To preserve the natural luster of these metals, they must be covered with a coat of clear. But prior to that, oxides on the surface must be removed, using 5% solution of citric or tartaric acid. The clear must be applied as soon as the surface is dry.